[:hk]自製韓國泡菜【酸甜辣脆】Homemade Kimchi [:en]Homemade Kimchi Recipe[:]
[:hk]
[embedyt] http://www.youtube.com/watch?v=cv0FMMp4V6Q%5B/embedyt%5D
![]() 點這裡免費訂閱肥丁 YouTube 頻道 https://goo.gl/rBq3rJ
點這裡免費訂閱肥丁 YouTube 頻道 https://goo.gl/rBq3rJ
大白菜原產於中國,其耐寒的特性和松樹相似,古時稱「菘」。入冬氣溫驟降,大白菜會由內而外,一層一層緊緊地捲起來,糖度到達頂點,吃起來特別清香脆嫩,以韓式的辣椒醬醃製成泡菜,匯聚酸、甜、辣、脆的口感,迅速喚醒你的食慾,無論當配料下飯或烹調菜餚,都能做出讓味蕾驚豔的好滋味。大白菜經過發酵後,維生素比原先增加至少 2 倍,含有豐富的乳酸菌,幫助消化,有抗癌的作用。高纖低脂,是理想的減重食材。

材料
- 大白菜 Napa Cabbage 2000 g ( 約 1 個)
- 白蘿蔔 Daikon 500 ~ 600 g ( 約 1 個 )
- 海鹽 Sea Salt 200 g
- 自製泡菜醬 Homemade Spicy Mixture

做法
1. 從大白菜根部到中央豎著對剖,別一刀切開唷,刀鋒碰到菜葉即可停止。雙手掰開大白菜,保留菜葉完整不散開,再以相同的方法,將2等份的大白菜分成 4 份


2. 把海鹽分成 4 等份,掀起菜葉,每一片葉均勻塗抹海鹽,放在大盤中,上壓重物,靜置 2 ~ 3 小時,大白菜會大量滲水變軟

3. 白蘿蔔去皮,切細段,放1小匙鹽,拌勻,醃 30 分鐘。倒去白蘿蔔滲出的水,瀝乾

4. 用流水沖洗大白菜,然後以冷開水浸泡約 30 分鐘,試味,若鹹味適中,將菜葉輕輕擰乾,放在網篩上瀝乾

5. 打開菜葉,把白蘿蔔、韭菜、蔥藏進菜葉中,均勻塗抹泡菜醬,捲成球狀,層層疊好放入玻璃瓶,別放太滿,因為加入泡菜醬後,大白菜可能會再次出水。置於室溫發酵,發酵時冒出小泡是正常現象。大白菜變酸後,可移到冰箱存放

小叮嚀
- 這配方的泡菜醬分量可醃 2 個約 2000 g 大白菜。用不完的泡菜醬可另存冰箱,留待下一次製作
- 醃製泡菜一般會加入大量辣椒粉,為免刺激皮膚,醃製時必須帶手套。這是微辣配方,醃製時可以不帶手套
- 若用夾鏈袋發酵,發酵時釋出的空氣會使夾鏈袋膨脹,打開夾鏈袋釋放空氣,再封好放進冰箱保存
- 泡菜醃製時間愈久,味道愈酸。雖然新鮮泡菜較好吃,但是醃製時間短的泡菜容易產生致癌物質「亞硝酸鹽」。有種說法是亞硝酸鹽會隨著時間被細菌分解,濃度達到高峰後會逐漸下降,醃製超過 1 個月或以上才品嚐比較安全。醃製時多加點蔥、薑、蒜、辣椒汁、檸檬汁,也能降低亞硝酸鹽的含量
- 泡菜發酵變酸的時間與溫度有關,溫度愈低需時愈長,任何階段都可以試味:
- 25 ~ 30ºC 約 1 天
- 15 ~ 20ºC 約 2 天
- 8 ~ 12ºC 約 4 天
 [:en]https://videos-by.vemba.io/v2/placements/27056.js
[embedyt] http://www.youtube.com/watch?v=cv0FMMp4V6Q%5B/embedyt%5D
![]() Subcribe YouTube https://goo.gl/rBq3rJ
Subcribe YouTube https://goo.gl/rBq3rJ
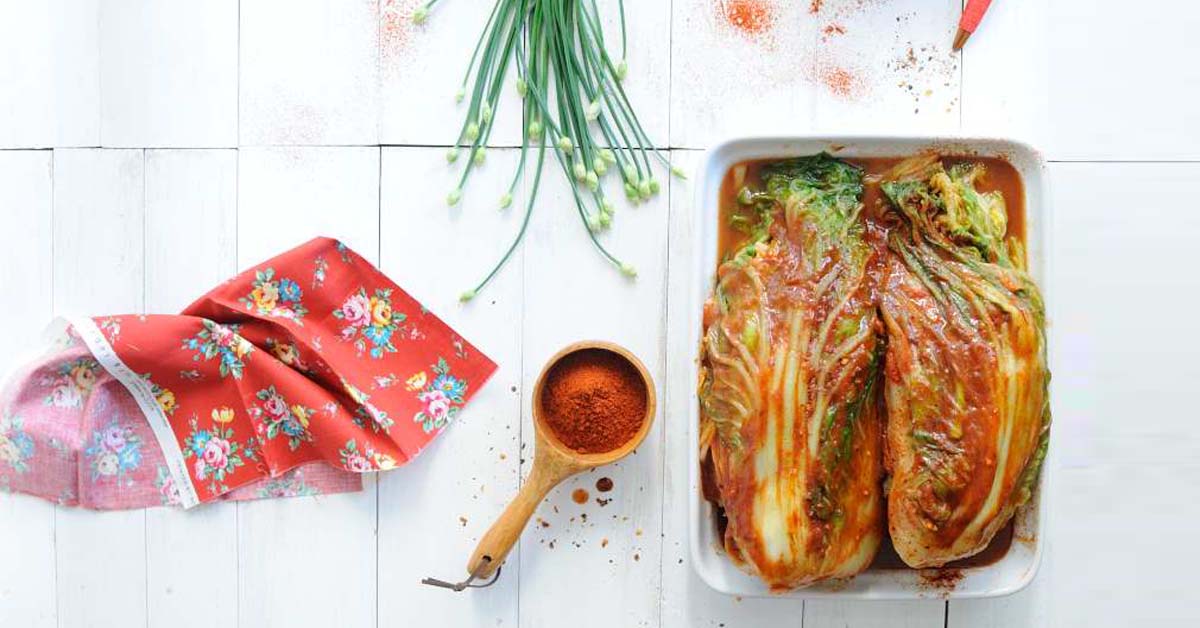
Real, homemade kimchi is beyond what you ever imagined it could be. Colourful, crisp, tangy and full of life and flavour. Serve this as a side dish-a garnish that will enhance the flavour of your meal.
Ingredients
- 2000 g Napa Cabbage
- 500 ~ 600 g Daikon Radish
- 200 g Sea Salt
- Homemade Spicy Mixture ( Click Here for recipe )
Preparation
1. To split a cabbage in half without shredding the densely packed leaves inside, first cut a short slit in the base of the cabbage, enough to get a grip on either half, and then gently pull the halves apart so the cabbage splits open. Cut a slit through the core of each half, 2 inches above the stem. Let the cabbage leaves to be loose but still attached to the core.
2. Divide sea salt into 4 equal portions. Sprinkle the salt between the leaves by lifting up every leaf and getting salt in there. Use more salt closer to the stems, where the leaves are thicker. Dunk the halves in a large basin of water to get them wet make easier. Put a plate on top and weigh it down with something heavy, like a jar or can of beans. Let stand for 2 to 3 hours.
3. Peel the skin of daikon radish. Cut into matchsticks, add 1 tsp salt, mix well and set aside for 30 minutes. Gently squeeze any remaining water from the daikon radish.
4. Rinse the cabbage under cold water 3 times and drain in a colander for 30 minutes. Rinse and dry the bowl you used for salting, and set it aside to use in step 5.
5. Using your hands, gently work the kimchi spicy mixture into the vegetables until they are thoroughly coated. Roll op the cabbage leaves. The gloves are optional here but highly recommended to protect your hands from stings, stains, and smells !
6. Pack the kimchi into the jar, pressing down on it until the brine rises to cover the vegetables. Leave at least 1 inch of headspace. Seal the jar with the lid. Let the jar stand at room temperature for 1 ~ 2 days. You may see bubbles inside the jar and brine may seep out of the lid; place a bowl or plate under the jar to help catch any overflow. Check the kimchi once a day, pressing down on the vegetables with a clean finger or spoon to keep them submerged under the brine. (This also releases gases produced during fermentation.) Taste a little at this point, too! When the kimchi tastes ripe enough for your liking, transfer the jar to the refrigerator. You may eat it right away, but it’s best after another week or two.
Reminder
- My kimchi spicy mixture can make 2000 g Napa cabbage x 2
- The longer time of ferment the more ripe and sour taste. Kimchi taste better and more safe to eat after 1 month. Add more ginger, garlic, spice, lemon juice to spice mixture can lower nitrite
- The warmer and more humid it is, the faster the kimchi will ferment. Once it starts to ferment it will smell and taste sour, and pressing on the top of the kimchi with a spoon will release bubbles from beneath.
- 25 ~ 30ºC will take 1 day
- 15 ~ 20ºC will take 2 days
- 8 ~ 12ºC will take 4 days
[:]


